📢Introduction
Verify your website in Google Search Console is a crucial step for any website owner looking to improve their site’s visibility in Google search results. This guide will walk you through the process of verifying your site, ensuring you can access all the powerful tools and insights Google Search Console has to offer.
📋Table of Contents
1. What is Google Search Console?
Google Search Console is a free tool provided by Google that helps website owners monitor, maintain, and troubleshoot their site’s presence in Google search results. It provides insights into how Google crawls and indexes your site, which can help you optimize your content for better rankings.
2. Why Verify Your Website in Google Search Console?
Verification is essential because it allows you to prove ownership of your website. Once verified, you gain access to valuable data and tools that can help you:
- Track search performance
- Identify and fix technical issues
- Submit sitemaps
- Monitor backlinks
- Optimize for mobile usability
⚙️Step 1: Sign in to Google Search Console
To get started, visit the Google Search Console website and sign in with your Google account. If you don’t have a Google account, you’ll need to create one.
⚙️Step 2: Add a Property

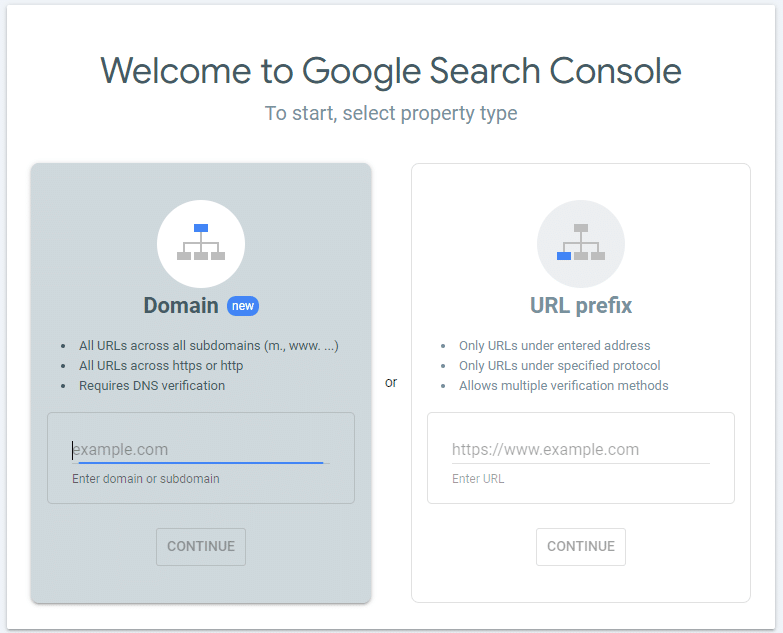
Once logged in, you’ll need to add your website as a property in Search Console. You can choose between two options:
- Domain: Verifies your entire domain, including all subdomains and protocols (http, https).
- URL Prefix: Verifies only the specific URL you enter.
🚀For most users, the Domain option is recommended for comprehensive coverage.
⚙️Step 3: Choose a Verification Method
Google provides several methods to verify your website:

➤HTML File Upload
- Download the provided HTML file.
- Upload the file to the root directory of your website.
- Click Verify in Search Console.
➤HTML Tag
- Copy the meta tag provided by Google.
- Paste it into the ‘
<head>‘ section of your website’s homepage. - Click Verify in Search Console.
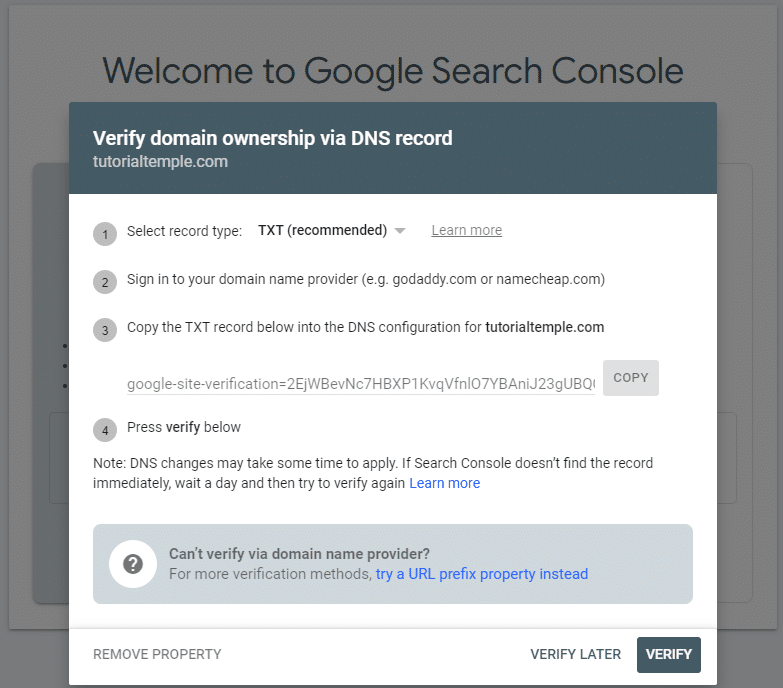
➤Domain Name Provider
- Select your domain registrar (e.g., GoDaddy, Hostinger etc.).
- Add a DNS TXT record to your domain’s DNS settings.
- Click Verify in Search Console.
➤Google Analytics
- If using Google Analytics, ensure the tracking code is installed.
- Select the Google Analytics option and click Verify.
➤Google Tag Manager
- If using Google Tag Manager, ensure the container snippet is installed.
- Select the Google Tag Manager option and click Verify.
⚙️Step 4: Verification Success
After completing the verification steps, Google will check your implementation. If successful, you’ll receive a confirmation message, and your site will be verified in Search Console.
⚙️Step 5: Troubleshooting Verification Issues
If verification fails:
- Double-check the steps for the method you chose.
- Ensure the HTML file or tag is correctly placed.
- For DNS verification, it may take some time for changes to propagate.
🎯Conclusion
Verifying your website in Google Search Console is a simple but essential task that unlocks powerful tools to help you optimize your site for search engines. Follow the steps in this guide to ensure your site is properly verified, and start leveraging the benefits of Google Search Console today.
